
Looking good on camera is less about genetics and more about control: light direction, camera height, lens distance, and what appears behind the subject. Small choices can reduce shadows, soften skin texture, and create a cleaner, more confident on-screen presence for meetings, courses, interviews, or promotional videos—using equipment already at home.
Start with camera position (it changes everything)
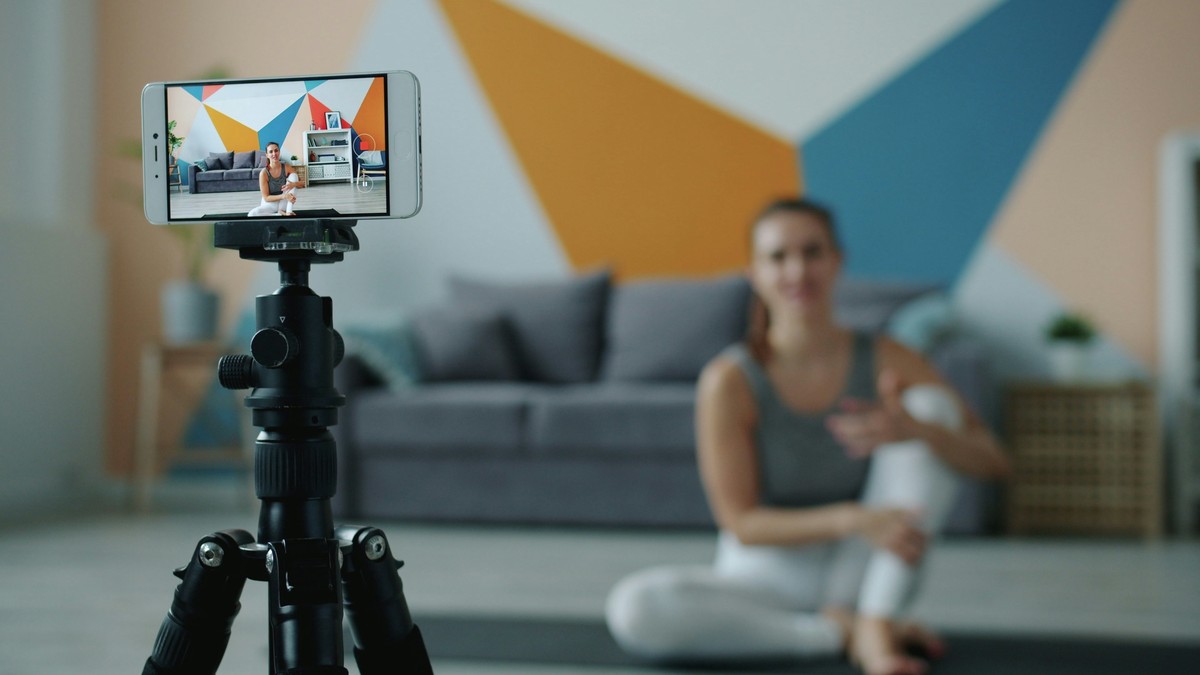
Before adjusting lighting, set the camera so facial proportions look natural. The most common unflattering setup is a laptop camera pointing up from desk level.
- Place the camera at eye level or slightly above.
- Move the camera further away and zoom slightly if possible; this reduces distortion.
- Keep the lens centred, not off to the side, to avoid awkward angles.
- Use grid lines if available and keep the horizon level.
If using a phone, a small tripod or clamp makes this easy. For laptops, a stack of books is often enough. If the camera must stay low, sit a little farther back to reduce the “up-the-nose†angle and keep posture tall but relaxed.
Eye line matters, too. Look at the lens when speaking, not at the on-screen self-view. A small sticky note near the lens can act as a reminder.
Use soft, front-facing light (avoid the overhead trap)
Overhead lighting creates under-eye shadows and emphasises texture. Backlighting from a window turns the face dark. The goal is soft light coming from in front of the face.
- Sit facing a window so daylight lights the face.
- Turn off overhead lights if they create mixed colour or harsh shadows.
- If daylight is too strong, soften it with a sheer curtain or by moving back from the window.
- Keep the brightest light slightly off-centre for gentle modelling (not flat glare).
At night, use a lamp placed behind the camera, aimed towards the face (not directly into eyes). A plain lampshade helps diffuse light. If the room lighting is very warm, keep it consistent; mixed warm and cool sources often look odd on skin.
Add a “fill†without buying a ring light
When one side of the face is dark, a simple fill can lift shadows and look more flattering. Fill should be subtle. The aim is natural brightness, not an overly smoothed look.
- Place a white piece of card or paper just out of frame to reflect light.
- Use a second lamp on low power, bounced off a wall for softness.
- Wear a lighter top; it can reflect light upwards naturally.
- If the background is bright, dim it first so the camera exposes correctly for the face.
For glasses wearers, angle the light slightly to the side and raise it a bit so reflections move out of the lens area. If glare persists, tilt the glasses down a fraction by adjusting nose pads or changing posture slightly.
Clean the background and create depth
A busy background pulls attention away from the speaker. A clean background also reduces the “home office chaos†look that many people dislike.
- Remove visual clutter: laundry piles, bags, bright packaging, open cupboards.
- Choose one simple backdrop: a plain wall, a tidy bookcase, or a curtain.
- Step 1–2 metres away from the background if space allows; separation adds depth.
- Add one intentional detail if desired (a plant, framed print, or lamp), but keep it minimal.
If the background is brighter than the face, the camera may underexpose the face. Dimming background lights or closing blinds behind can help. Avoid sitting with a window directly behind; it is the quickest way to look dull and underlit.
Clothing, colour, and small grooming choices
Camera sensors compress contrast and can exaggerate shine. A few practical choices improve appearance without becoming fussy.
- Avoid tiny, high-contrast patterns that can create moiré.
- Choose solid colours that contrast gently with the background.
- If skin shines under light, blot with tissue or use a light mattifying product.
- Keep glasses clean; smudges catch light and look distracting.
- Position hair so it does not cast heavy shadows across the face.
These are refinements. Lighting and camera position create most of the improvement; clothing and grooming polish the result. If the camera keeps shifting brightness, lock exposure if available so the face stays consistent throughout the recording.
Next steps (a repeatable room setup)
Choose one spot in the home that consistently has good light (often near a window). Leave a small setup there: a phone tripod or laptop stand, a lamp position, and a tidy background corner. Do a 20-second test recording once, note what works, and replicate it.
- Record 10 seconds and check both picture and audio with headphones.
- Adjust the light before adjusting the camera (light is the bigger lever).
- Save the setup: mark tripod height with tape, keep the chair in the same place, and leave one “camera-ready†background corner tidy.
For the next call or video, adjust only one variable at a time—camera height, light position, or background distance. A stable setup removes daily guesswork and makes looking good on camera the default rather than a lucky outcome.